AI Template Generation
AI Template Generation lets you create and edit PDF templates using prompts and reference files. Describe your requirements, attach example files, and the AI generates your complete template – HTML code, sample data, and PDF parameters (page format, orientation, header/footer).
See how it works and start creating templates from a prompt: AI PDF Generator.
Creating Templates with AI
To create a new template with AI:
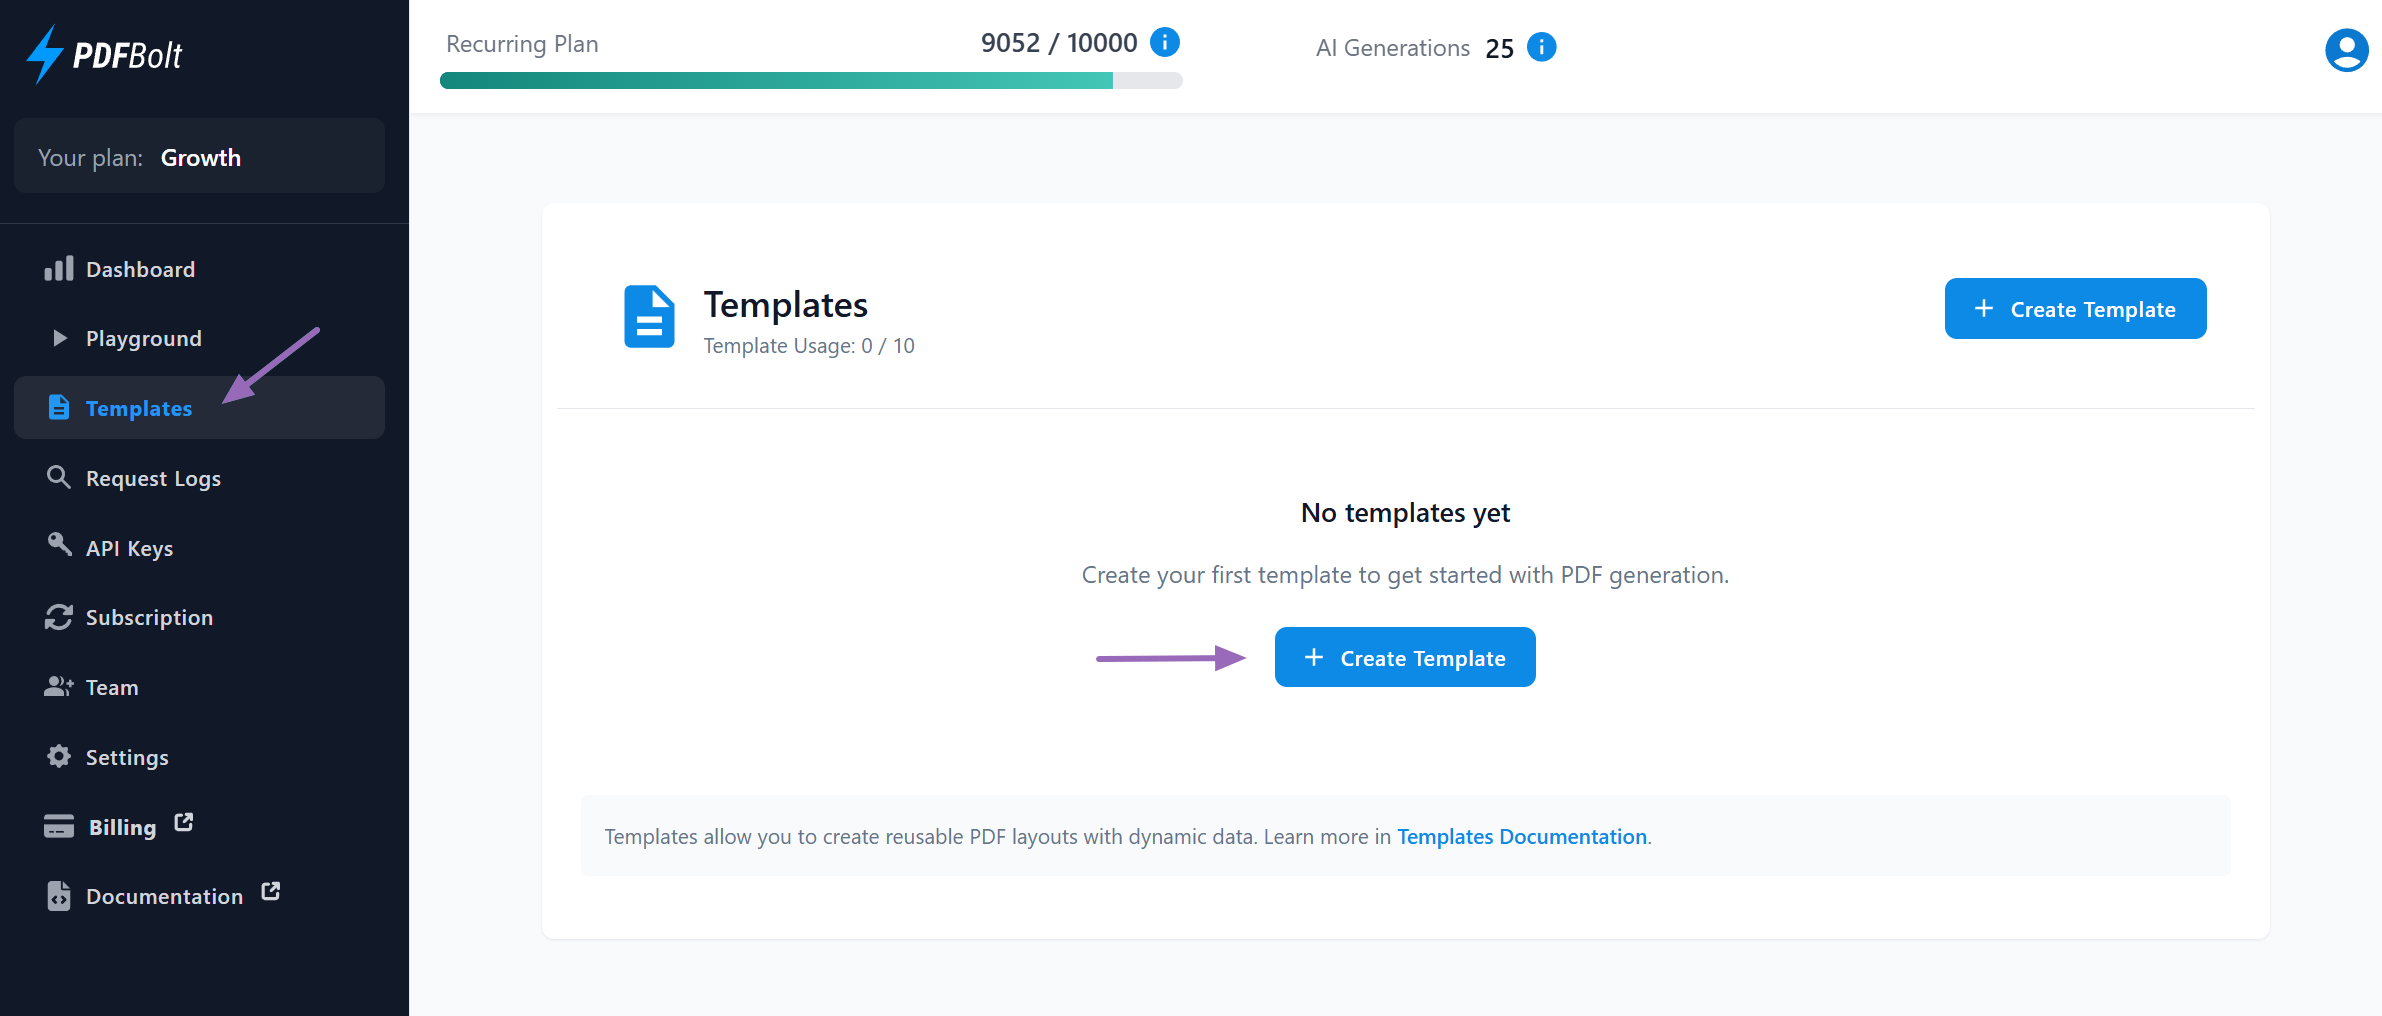
1. Click "Create Template" in the Templates section of your Dashboard.
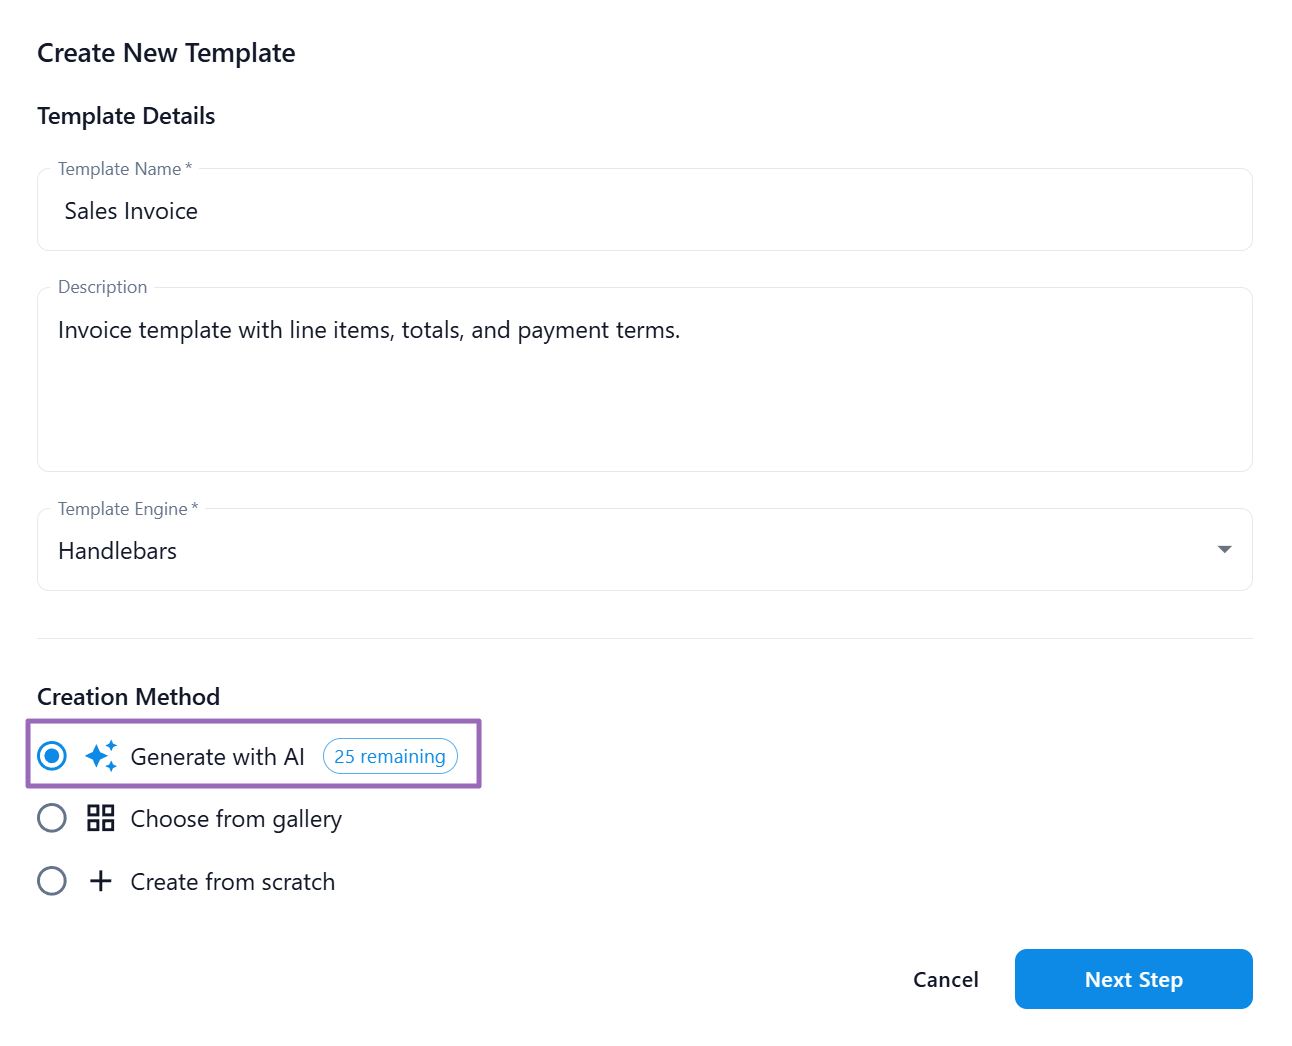
2. Enter a Template Name and optional description.
3. Select "Generate with AI" as your creation method.
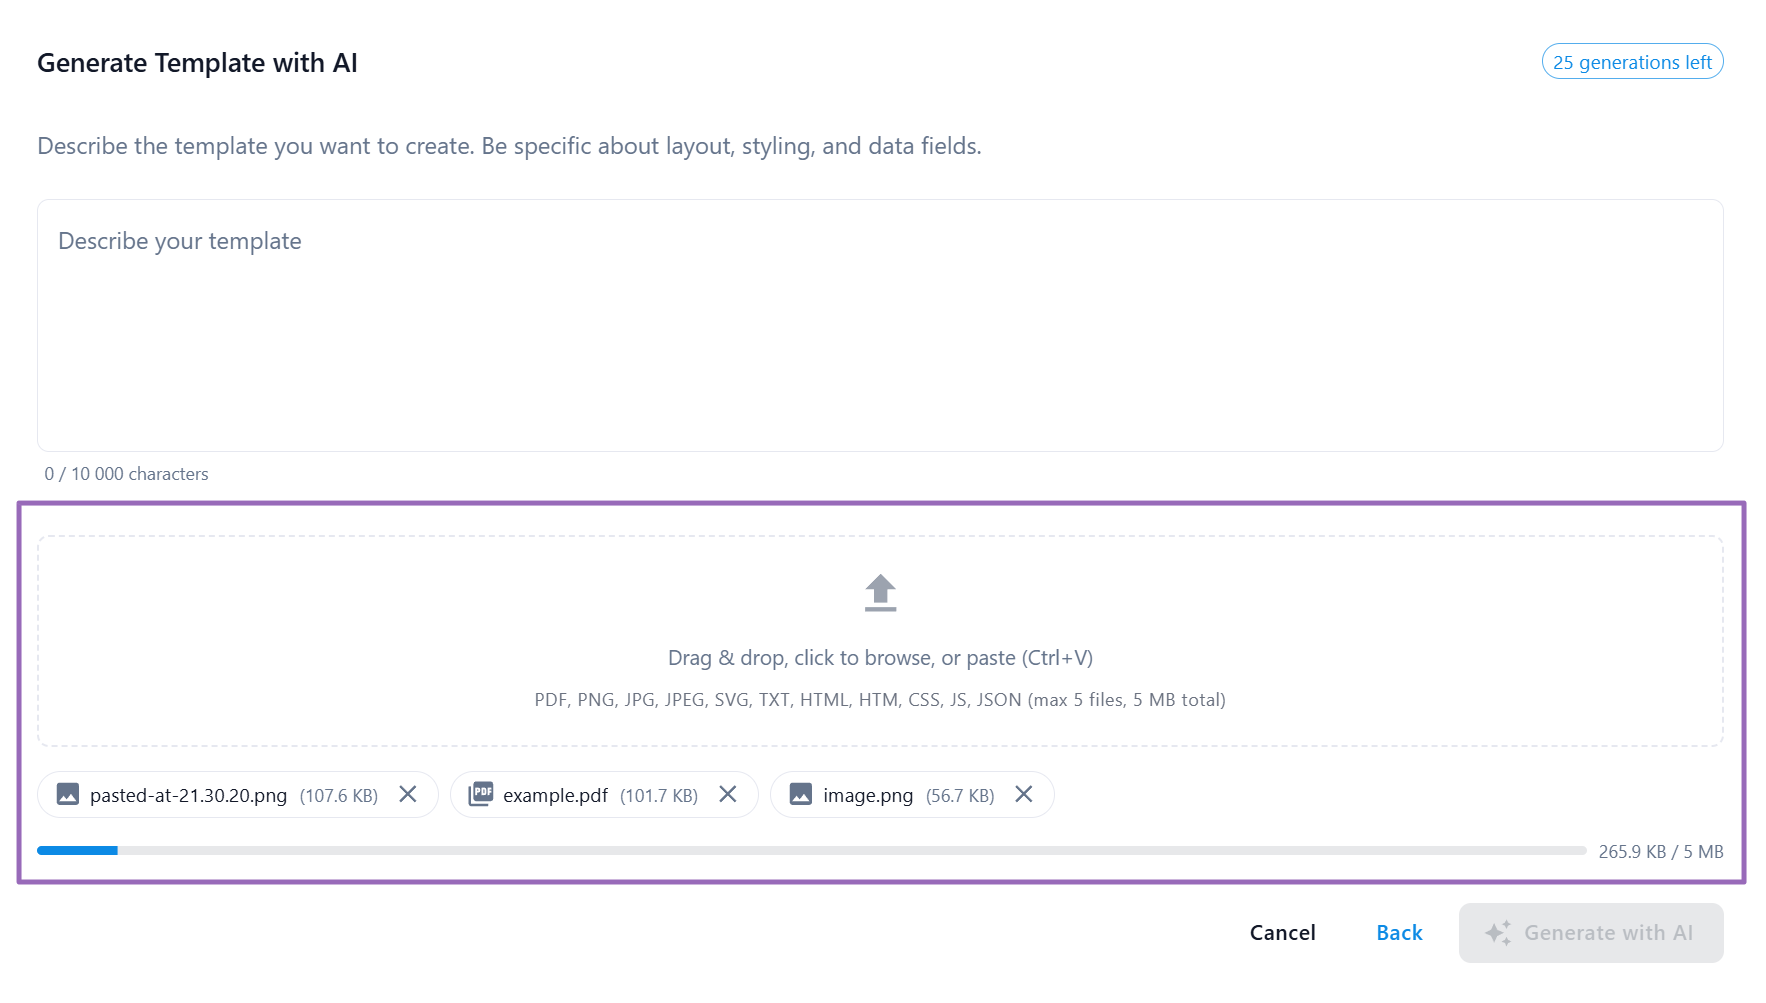
4. Enter a detailed description of the template you want to create. You can also attach reference files to give the AI more context.
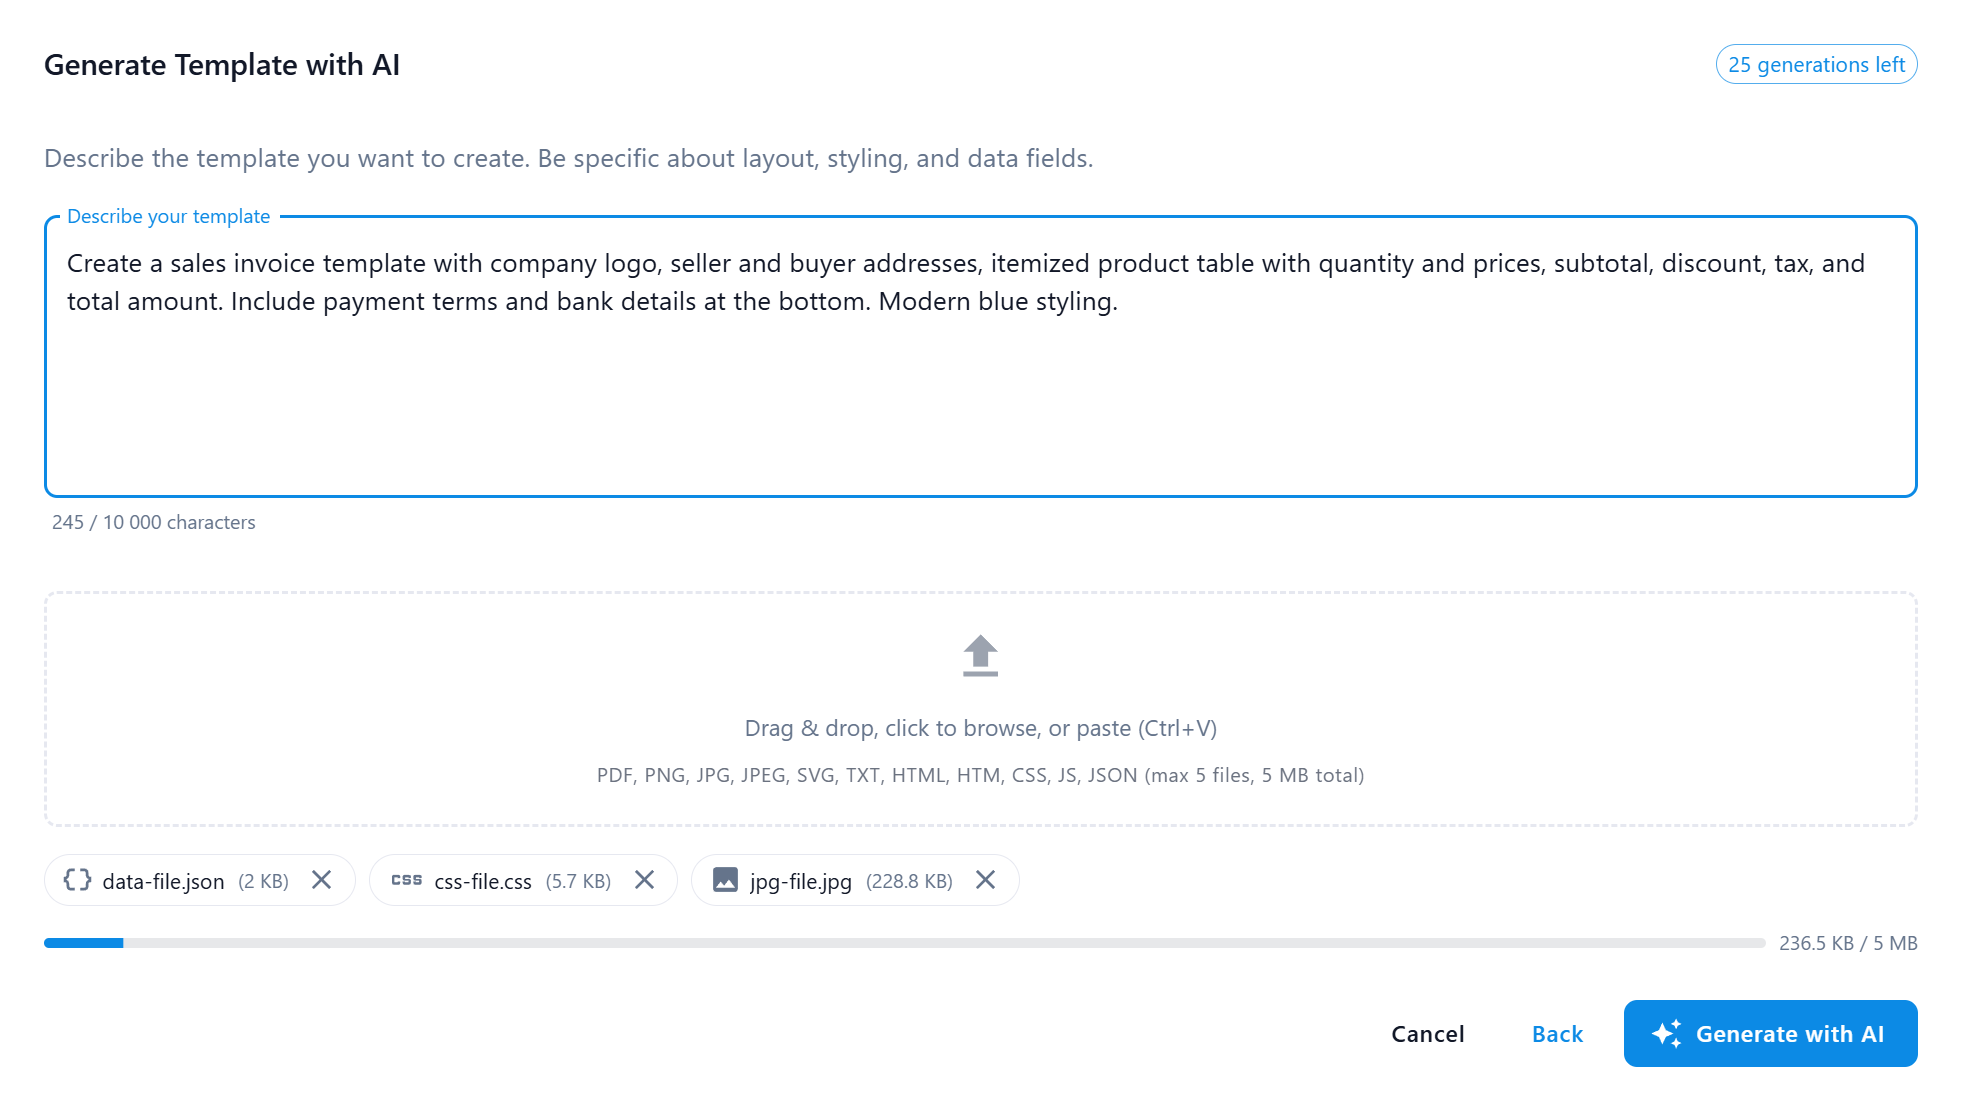
5. Click "Generate with AI" and let the AI create your template (typically 1-3 minutes, depending on prompt complexity and attached files).
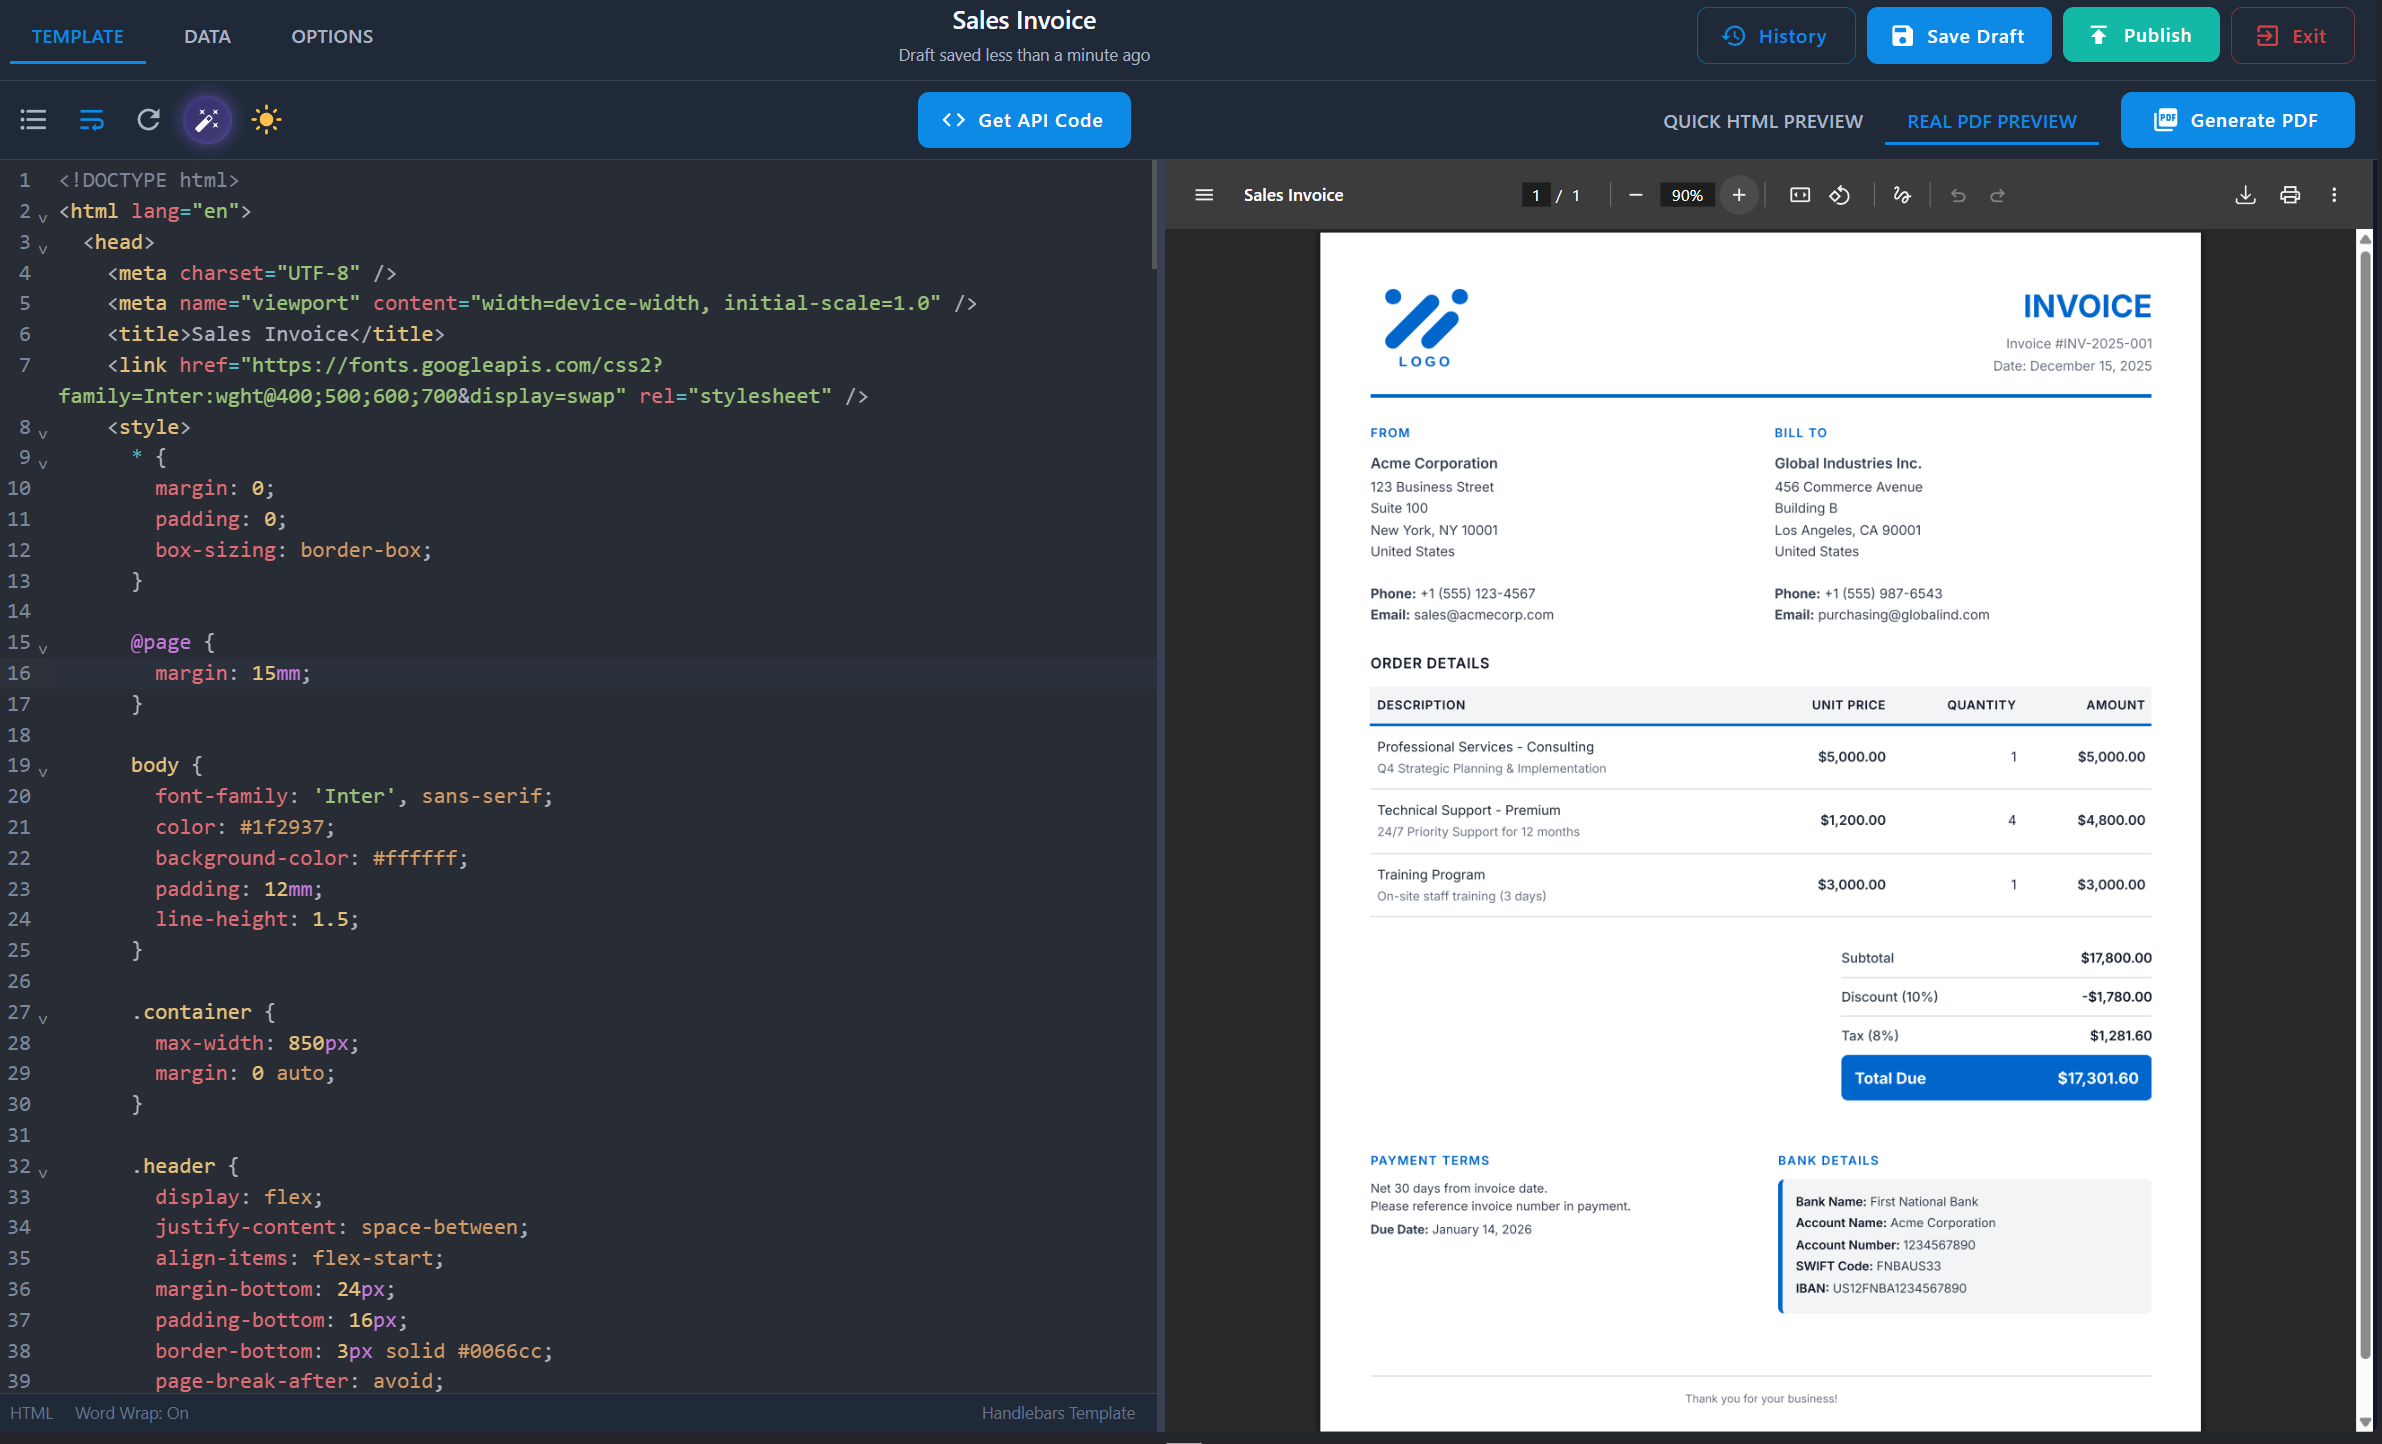
6. Preview the generated template in the Quick HTML Preview and refine in the Designer as needed.
7. Generate a Real PDF Preview to check how your template looks in the final output.
8. Publish the template when it's ready. Templates stay in draft until published, and only published templates can be used with the API.
AI-generated templates start as drafts. Preview and refine them first, then publish the version before using its templateId in API requests. Calling the API with a draft-only templateId returns "Template with ID ... has no active version".
Effective Prompts
Here is an example of an effective prompt for an invoice:
Create a professional invoice template. Header: company logo on the left, company details (name, address, phone, email, website) on the right. Below the header, a full-width row with invoice number, issue date, and due date. Two address blocks side by side: 'Bill From' and 'Bill To' – each with name, company, address, city, postal code, and country. Main section: itemized table with columns for description, quantity, unit price, and line total. Below the table: subtotal, discount (percentage and amount), tax (rate and amount), and total highlighted. At the bottom: payment terms, QR code for payment, and a short thank you message. Footer with page numbers. Clean modern styling with blue accent color.
The more specific your description, the better the results. Include details about:
- Layout structure – describe sections, columns, and how elements should be positioned.
- Data fields – specify what information to display and where (names, dates, addresses, line items, totals).
- Visual elements – mention if you need images, logos, charts, QR codes, or barcodes.
- Styling – indicate color scheme, font preferences, borders, or reference a style (e.g., "modern", "minimalist", "formal").
- Page format – specify size (A4, Letter, A6), orientation (portrait, landscape), and header/footer requirements.
Prompt limit: 10,000 characters.
Attach Reference Files
You can attach reference files to give the AI more details about your template:
Supported file types:
- Documents: PDF
- Images: PNG, JPG, JPEG, SVG (including pasted screenshots)
- Text & Code: HTML, CSS, JavaScript, JSON, TXT
How to attach files:
- Drag and drop files into the attachment area.
- Click to browse and select files.
- Paste from clipboard (Ctrl+V / Cmd+V).
File limits:
| Plan | Max Total Size | Max Files |
|---|---|---|
| Free | 1 MB | 5 |
| Paid | 5 MB | 5 |
Reference files are used only as context for the AI operation – not stored as template assets, and not used for training AI models.
Example use cases:
- Attach a PDF of an existing document you want to recreate.
- Include a logo to help the AI match the template style to your branding.
- Share a screenshot of a design you'd like to replicate.
- Provide sample HTML/CSS for reference.
Generated Output
When the AI creates your template, you receive:
| Component | Description |
|---|---|
| HTML Template | Complete HTML/CSS code with Handlebars variables. |
| Sample Data | JSON data structure matching your template variables. |
| PDF Parameters | Page format, orientation, print background, render waits, and optional header/footer. |
AI-generated templates are fully editable. You can fine-tune them manually in the Designer or use AI Assist to refine specific sections.
Editing Templates with AI
You can use the AI to modify existing templates – whether they were AI-generated, created from scratch, or selected from the gallery.
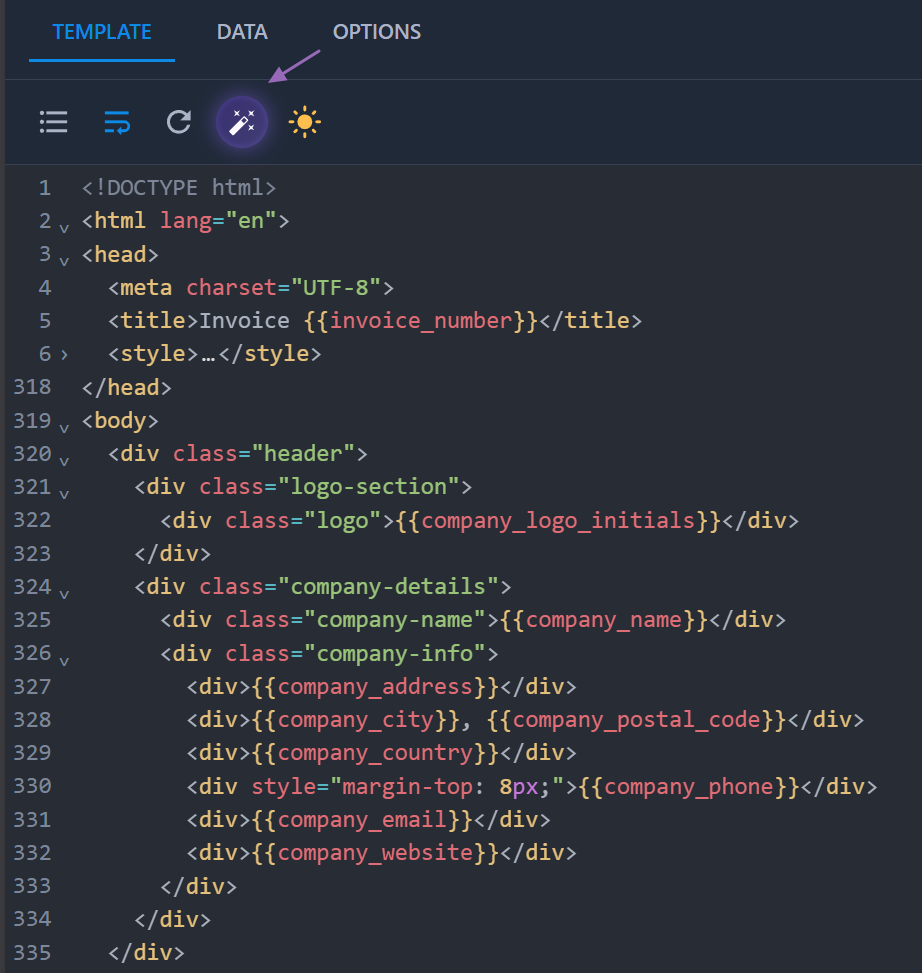
1. In the Template Designer, click the AI Assist button in the code editor toolbar.
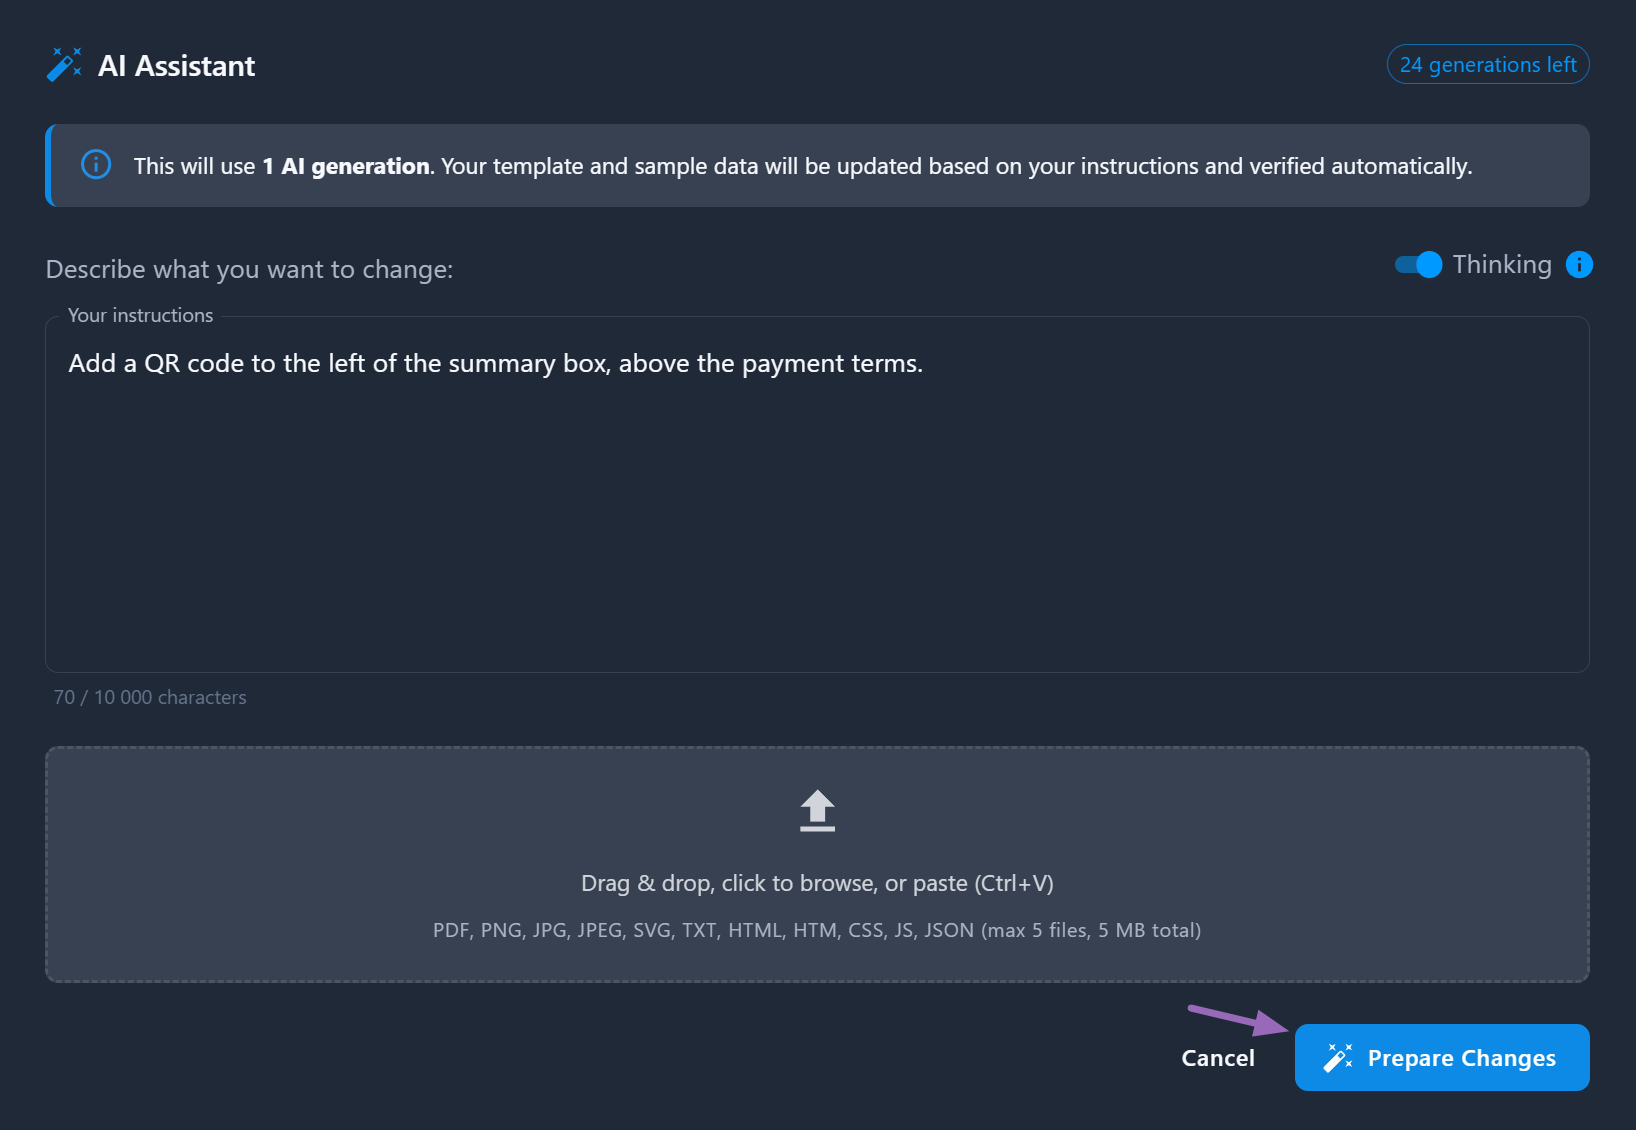
2. Describe the changes you want to make in the prompt field. You can also attach reference files (images, PDFs, code) to provide additional context.
3. Click "Prepare Changes" and wait for the AI to modify your template.
4. Review the AI-generated changes in the Review Modal and choose to "Accept" or "Reject" them.
Example Edit Instructions
Adding elements:
- Add a discount field to the invoice.
- Add a QR code in the top right corner.
- Include a notes/comments section after the items table.
Styling changes:
- Change the color scheme to blue and white.
- Make the table headers bold and add alternating row colors.
- Increase font size and add more spacing between sections.
Layout modifications:
- Move the logo to the center and make it larger.
- Add a sidebar with contact information.
- Split the address section into two columns.
You can make multiple edits in sequence, refining your template step by step until it matches your exact requirements.
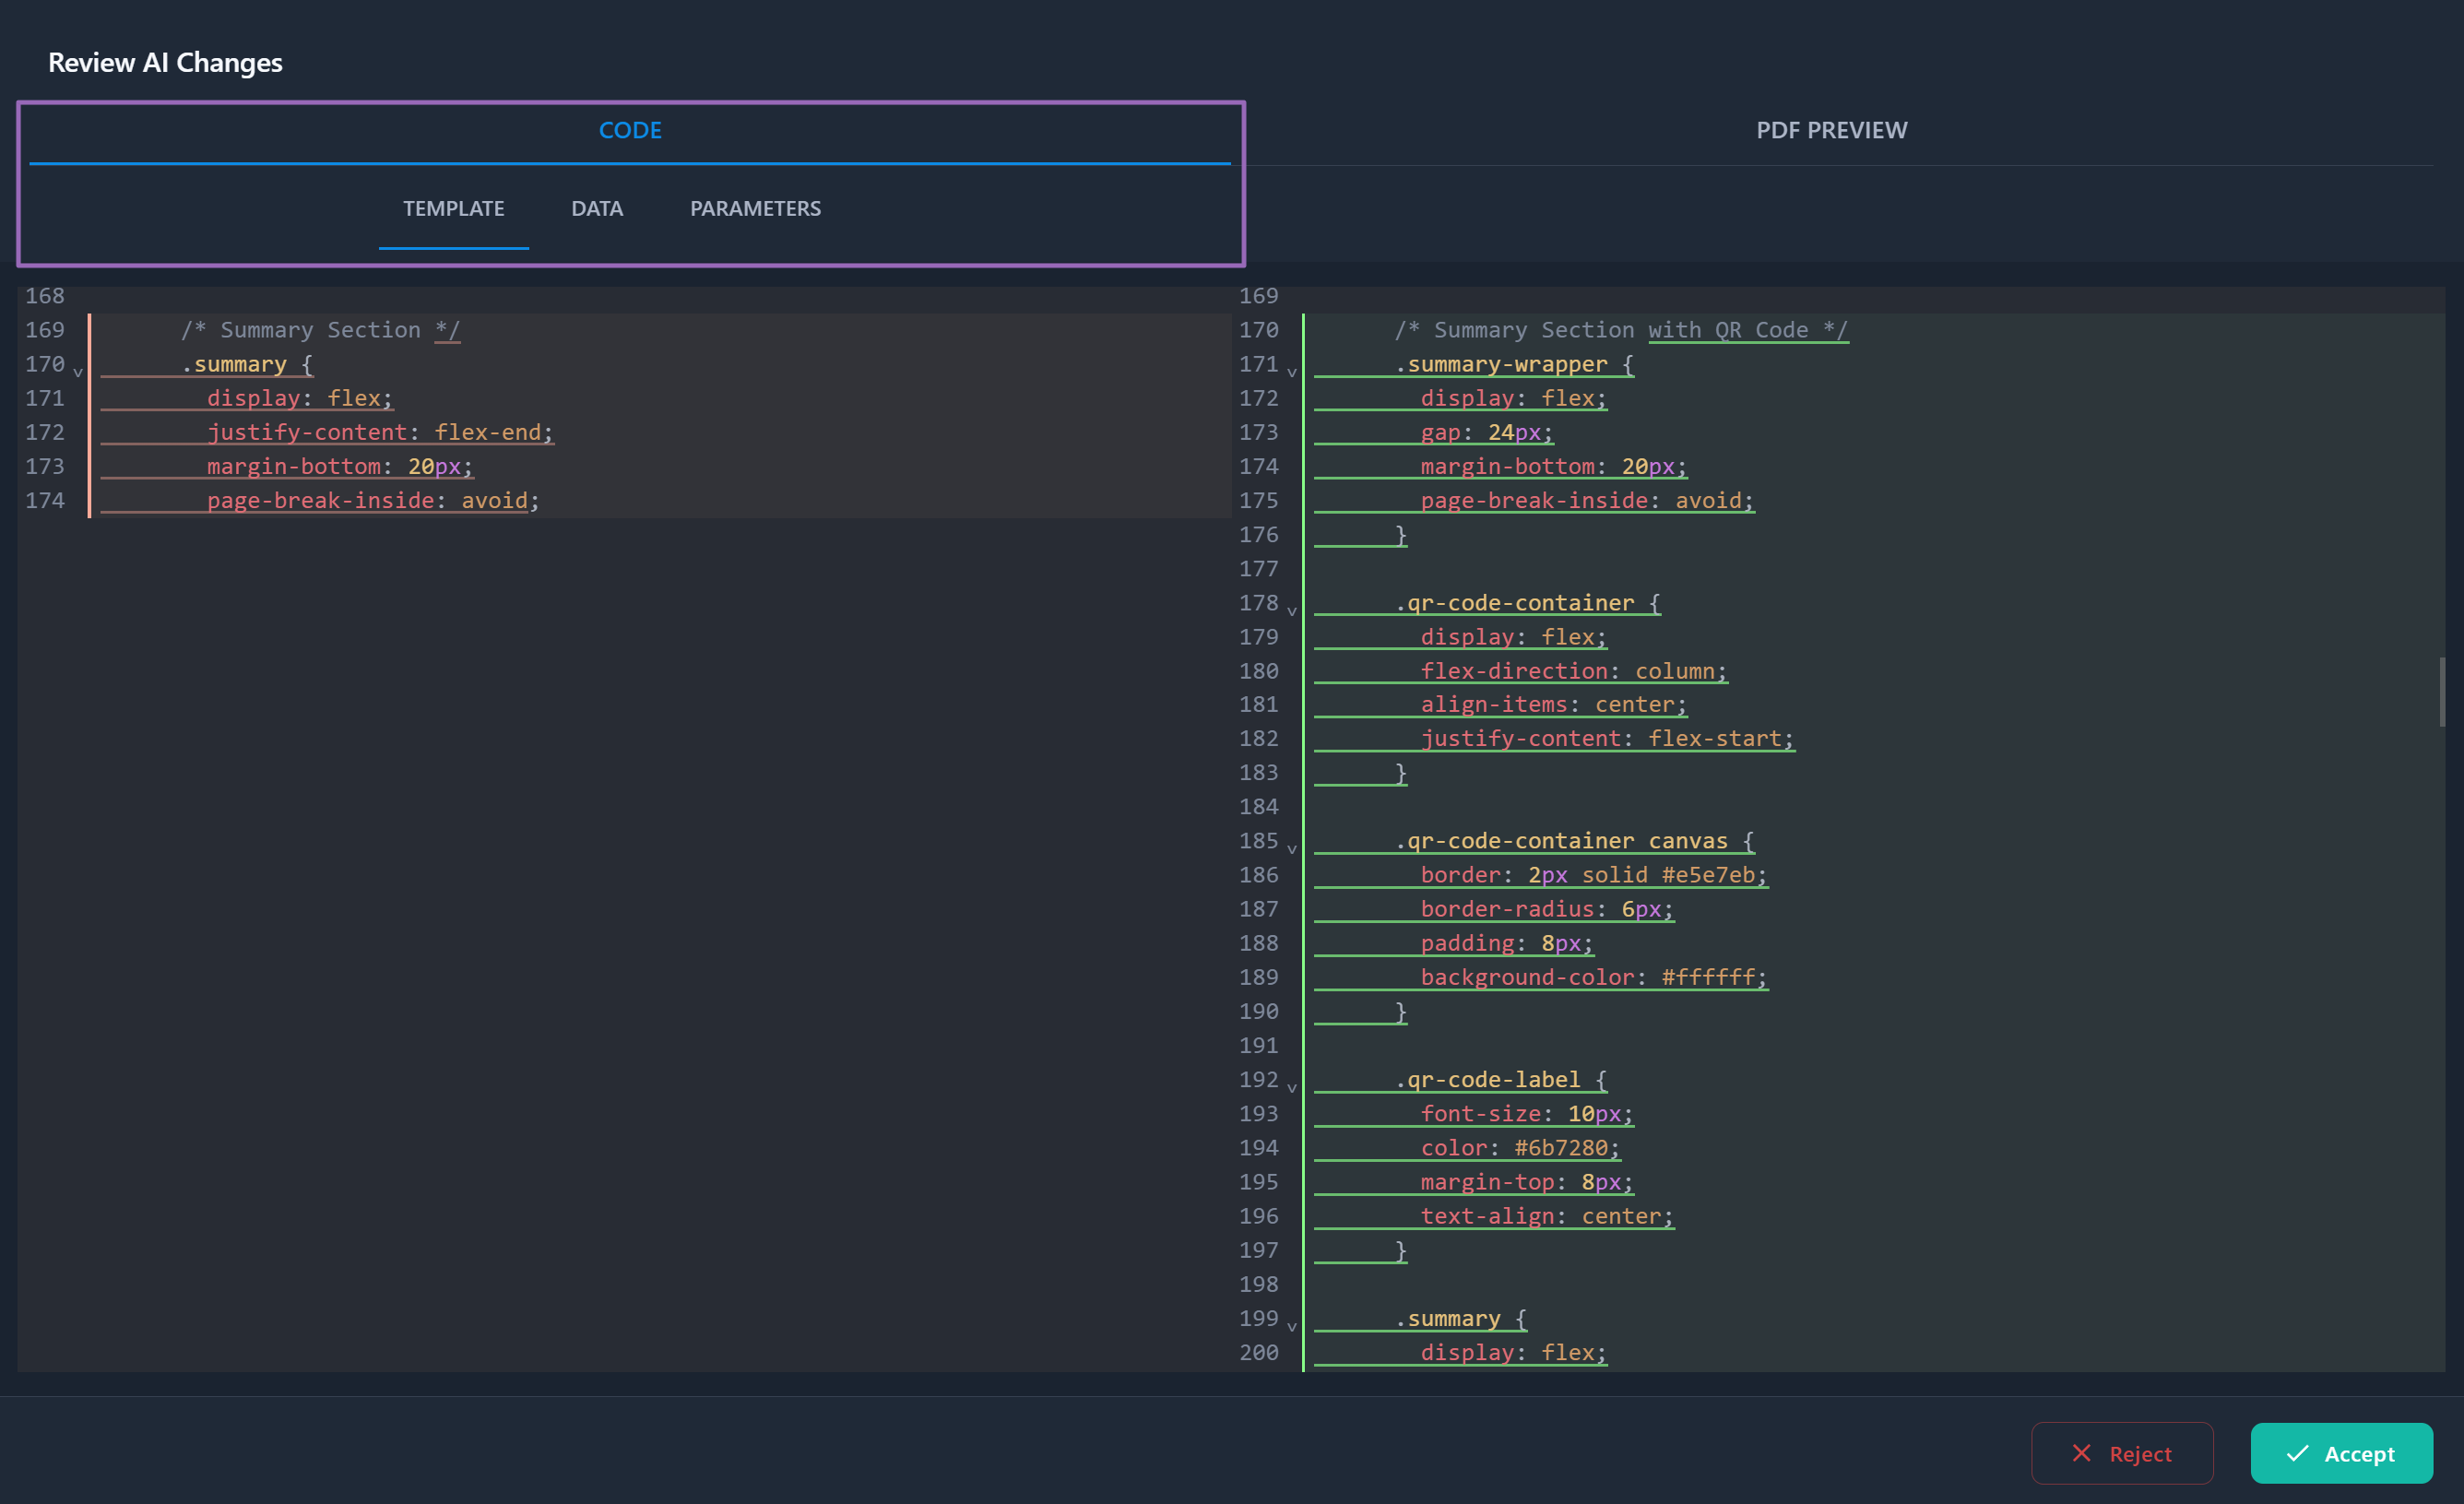
Review AI Changes
After the AI processes your request, you'll see the Review AI Changes modal where you can examine and approve the changes before applying them.
Code View
Compare changes across three tabs:
- Template – Side-by-side diff of HTML/CSS and Handlebars code showing additions, removals, and modifications.
- Data – Changes to sample JSON data.
- Parameters – PDF parameter changes (page format, orientation, print background, render waits, and optional header/footer).
PDF Preview
Switch to the PDF Preview tab to see before (1) and after (2) renderings side by side, helping you verify the visual result matches your expectations.
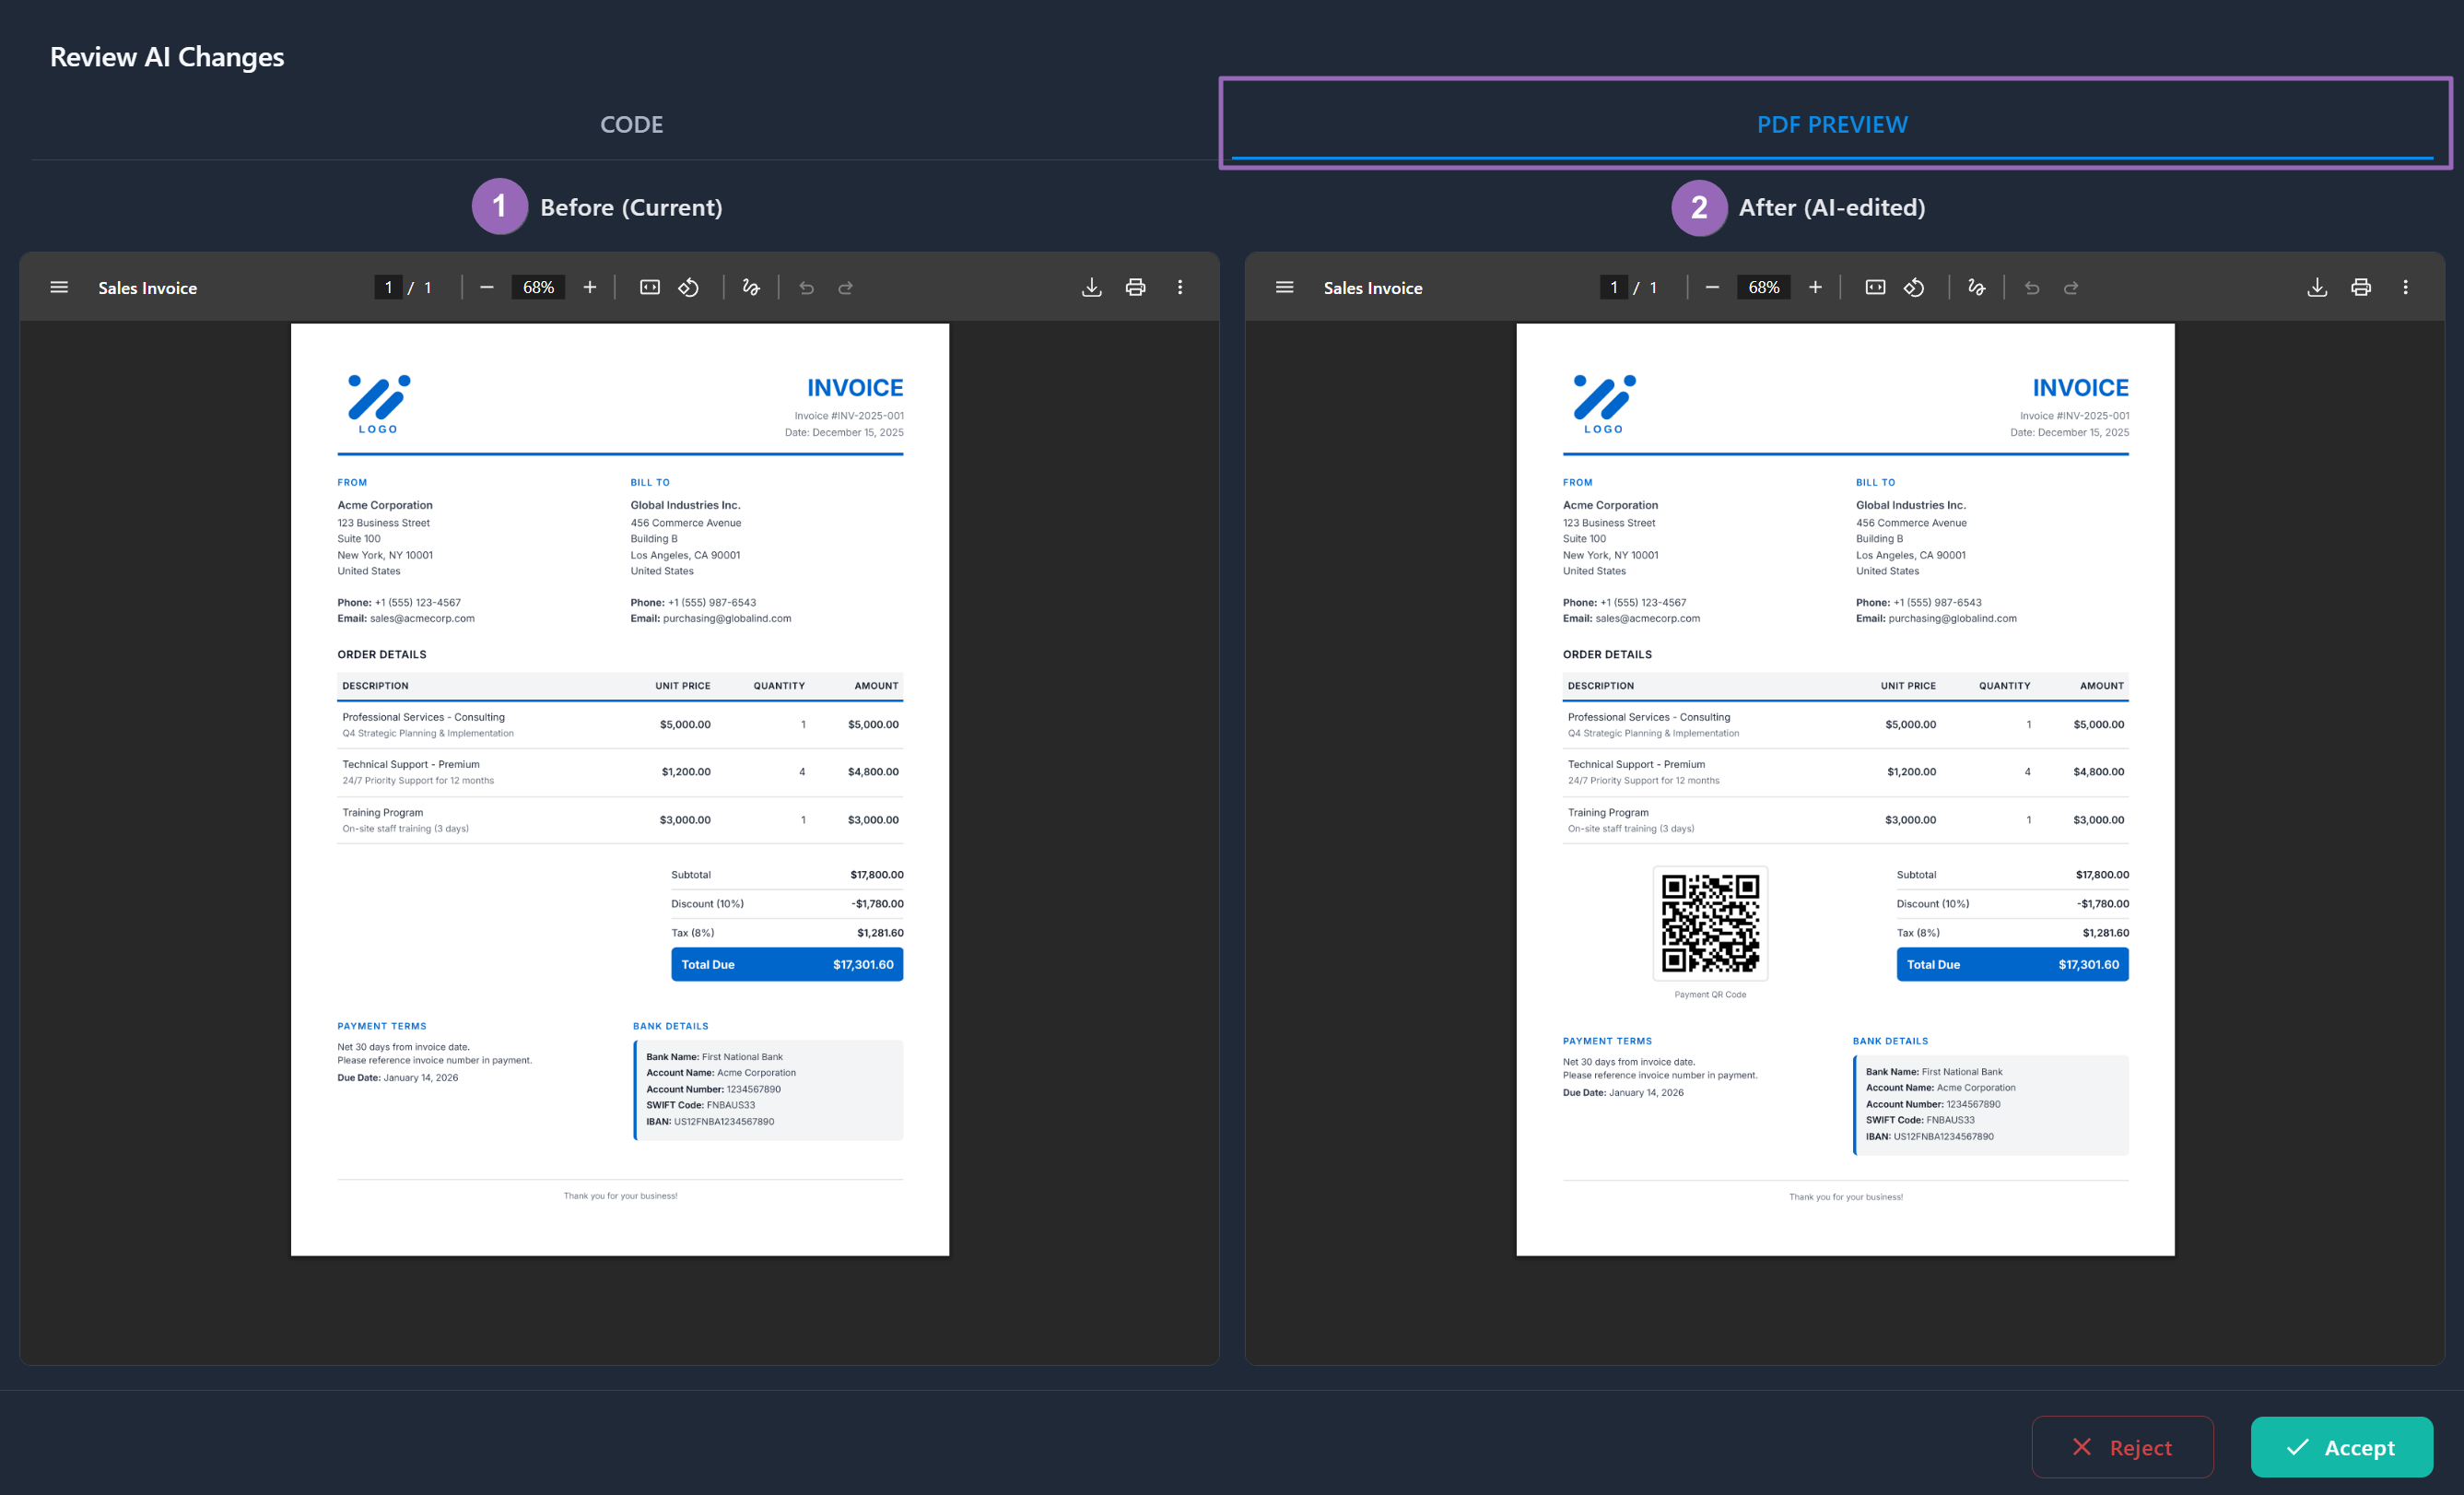
Accept or Reject
After reviewing the changes:
- Click "Accept" to apply the AI-generated changes to your template.
- Click "Reject" to discard changes and return to try a different prompt.
How AI Template Generation Works
AI Template Generation uses advanced language models to understand your requirements and generate complete, functional templates. When you submit a prompt, you'll see a progress indicator with these steps:
-
Analyzing your request – AI reads and understands your requirements.
-
Designing layout structure – AI plans sections, columns, and positioning.
-
Creating HTML template – AI generates HTML/CSS code with Handlebars variables.
-
Generating sample data – AI creates JSON data matching your template.
-
Finalizing your template – AI completes and validates the output.
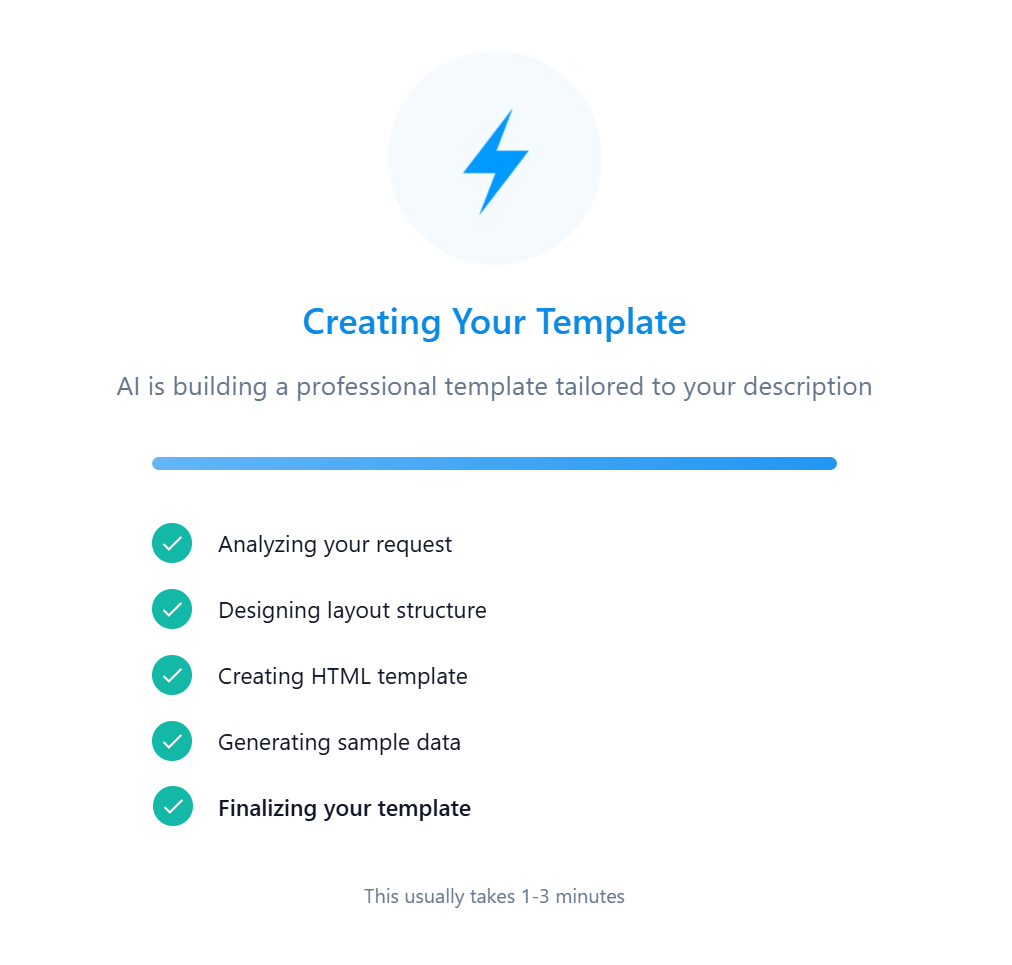
Generation usually takes 1-3 minutes, depending on the complexity of your prompt, attached files, output size, and amount of sample data.
AI Generation Limits
Each subscription plan includes a quota of AI template generations:
| Plan | AI Generations |
|---|---|
| Free | 1 (one-time) |
| Basic | 10 / month |
| Growth | 50 / month |
| Enterprise | 150 / month |
- Each AI operation (create or edit) uses 1 generation from your quota.
- A generation is consumed when AI processing starts, even if you later reject the suggested edit.
- Free plan: 1 generation granted at registration; not renewed.
- Paid plans: generations reset monthly with your billing cycle.
- You can view your remaining generations in the Dashboard navbar.
On the Free plan, you need to add a payment method to access AI features. The card is used for verification only – no charges are made on the Free plan.
Troubleshooting
If AI generation or editing fails, check these common issues:
| Problem | Cause / Fix |
|---|---|
No AI generations left | Paid plans reset monthly with your billing cycle. Free plan AI generation is one-time – upgrade your plan to get more. |
Payment method required | Add a payment method to your Free plan for verification – no charges are made. |
AI system is experiencing high demand | Affects the Free plan during peak usage. Try again later. |
Prompt is too long | Reduce your prompt to 10,000 characters or less. |
Total attachment size exceeds the limit | Remove files or upgrade your plan (Free: 1 MB, Paid: 5 MB total). |
Unsupported file type | Use one of: PDF, PNG, JPG/JPEG, SVG, TXT, HTML/HTM, CSS, JS, or JSON. |
Too many attachments | Attach up to 5 files per request. |
Empty prompt | Add a description of the template or edit you want the AI to create. |
Template and sample data are too large for AI editing | Simplify the current template or sample data before requesting AI edits. |
Related Resources
📄️ Template Management
Complete template creation and management workflow
📄️ PDF Templates Gallery
Browse ready-to-use professional templates
📄️ Templates Overview
Learn about template concepts, benefits, and use cases
🔗 Handlebars Docs
Official templating syntax guide